- First separate a robot that is not releasing water from a dock that is not washing or refilling the mops; they use different water paths.
- Confirm the exact model is in a mopping mode with water flow above zero, then check tank fill and detection, correct mop installation, pad condition and only the outlets or vents approved for user cleaning.
- Use only model-approved water or solution, stop for leaks or electrical exposure, and leave internal pumps, valves, sensors and sealed water lines to authorized service.
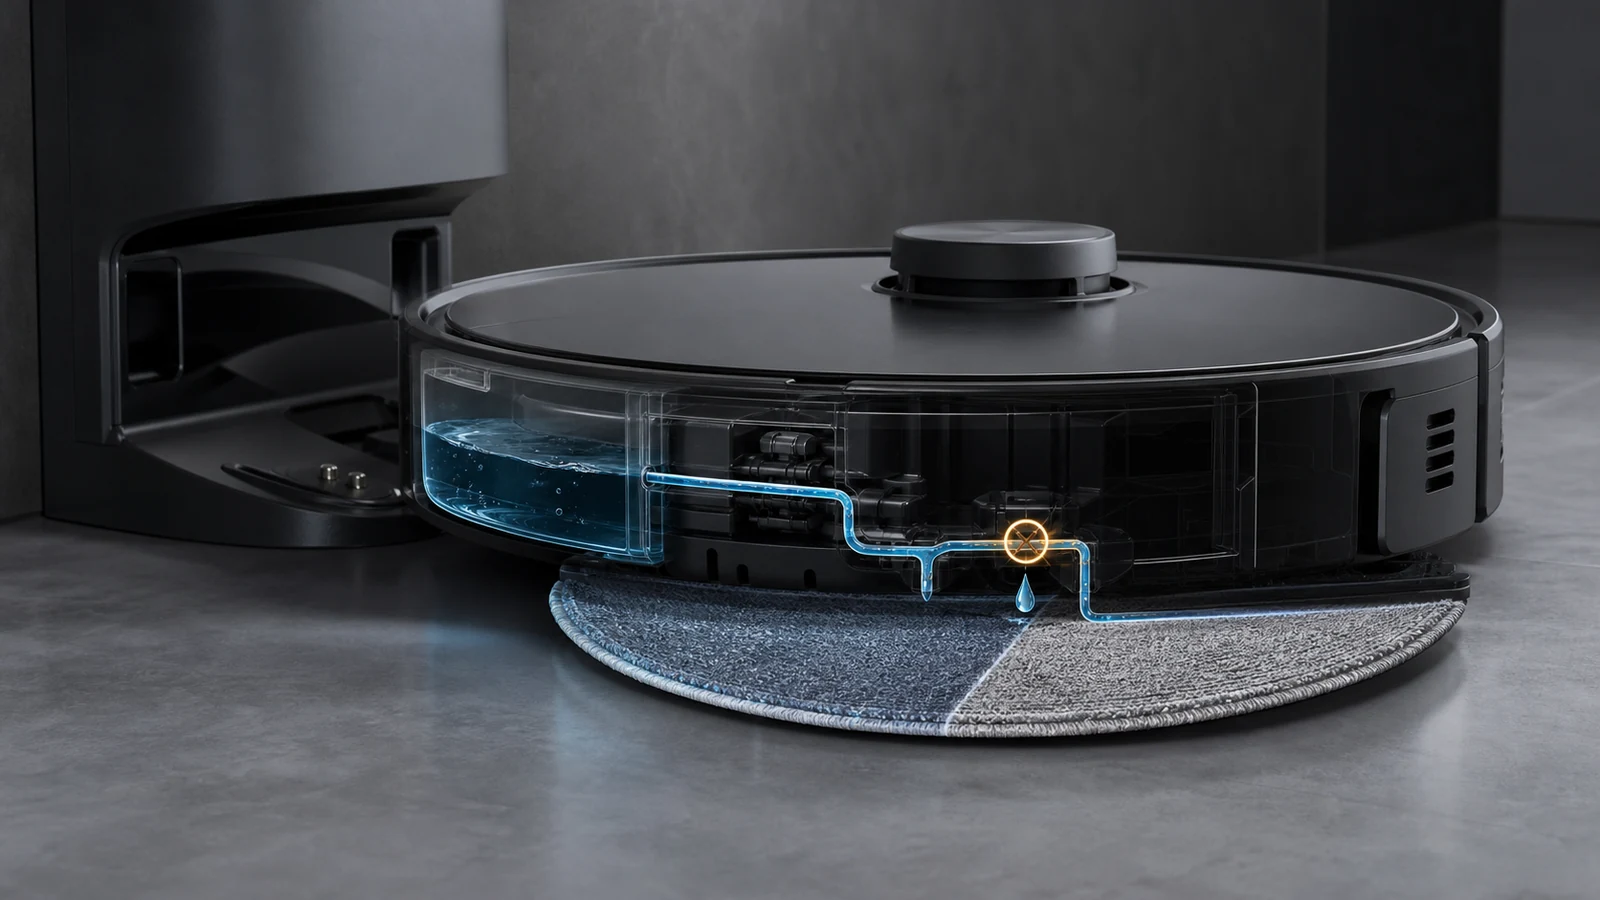
If your robot vacuum is not dispensing water, first confirm that the exact model is in a mopping mode, its water-flow setting is above zero, the correct tank or water module is filled and recognized, and the mop holder and pad are installed correctly. Then inspect only the user-accessible outlet, vent, filter or pad areas named in the manual before concluding that an internal pump, valve or water line has failed.
Do not assume a dry-looking floor proves that no water is moving. Some systems meter small amounts into the pad, while an all-in-one dock may pre-wet or periodically replenish the mop. Record the mode, flow setting, water level, App message, tank type and whether the dock can wash or refill before disassembling anything.
Robot Vacuum Water Problems at a Glance
| What you observe | Main area to investigate | First safe check |
|---|---|---|
| Mop stays completely dry | Mode, flow setting, tank detection or outlet | Confirm a supported mopping task and correct installation |
| Mop begins wet, then becomes dry | Replenishment timing, tank level, restriction or pump | Compare behavior over the model-approved test interval |
| One side is wetter than the other | Pad fit, outlet distribution or blockage | Refit the correct pad and inspect approved outlets |
| App says tank missing | Tank seating, magnet or detection sensor | Remove and reinstall the correct tank normally |
| Tank level does not change | No flow, very low metering or unrecognized module | Use the manual's controlled water-flow check |
| Dock washes mops but robot does not dispense | Onboard tank, refill path, mode or robot pump | Separate dock washing from robot-side delivery |
| Robot dispenses but dock will not wash | Dock tanks, filter, tray or dock pump | Use the dock-washing procedure, not this robot path |
| Water leaks under the robot | Tank seal, cap, crack, outlet or internal line | Stop mopping and keep water away from electrical parts |
Water architecture varies widely. Some robots use removable gravity-fed tanks, some use electronic pumps, and premium systems may refill an integrated robot tank from the station. Never apply one model's outlet-clearing or additive advice universally.
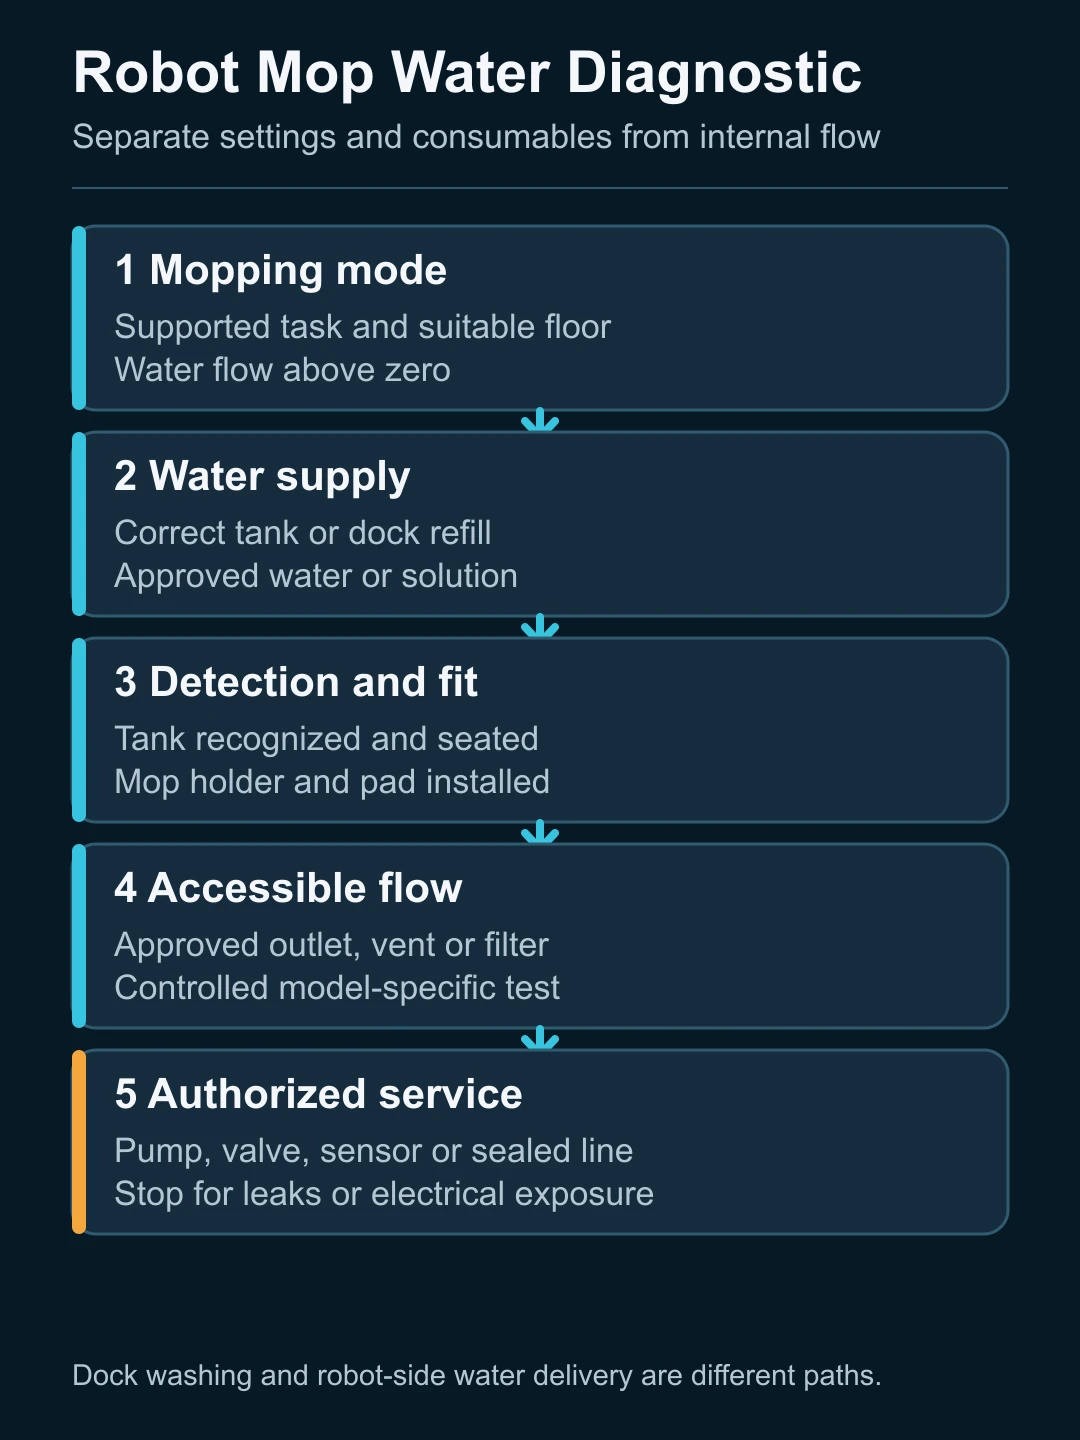
First Separate Robot Dispensing from Dock Water Functions
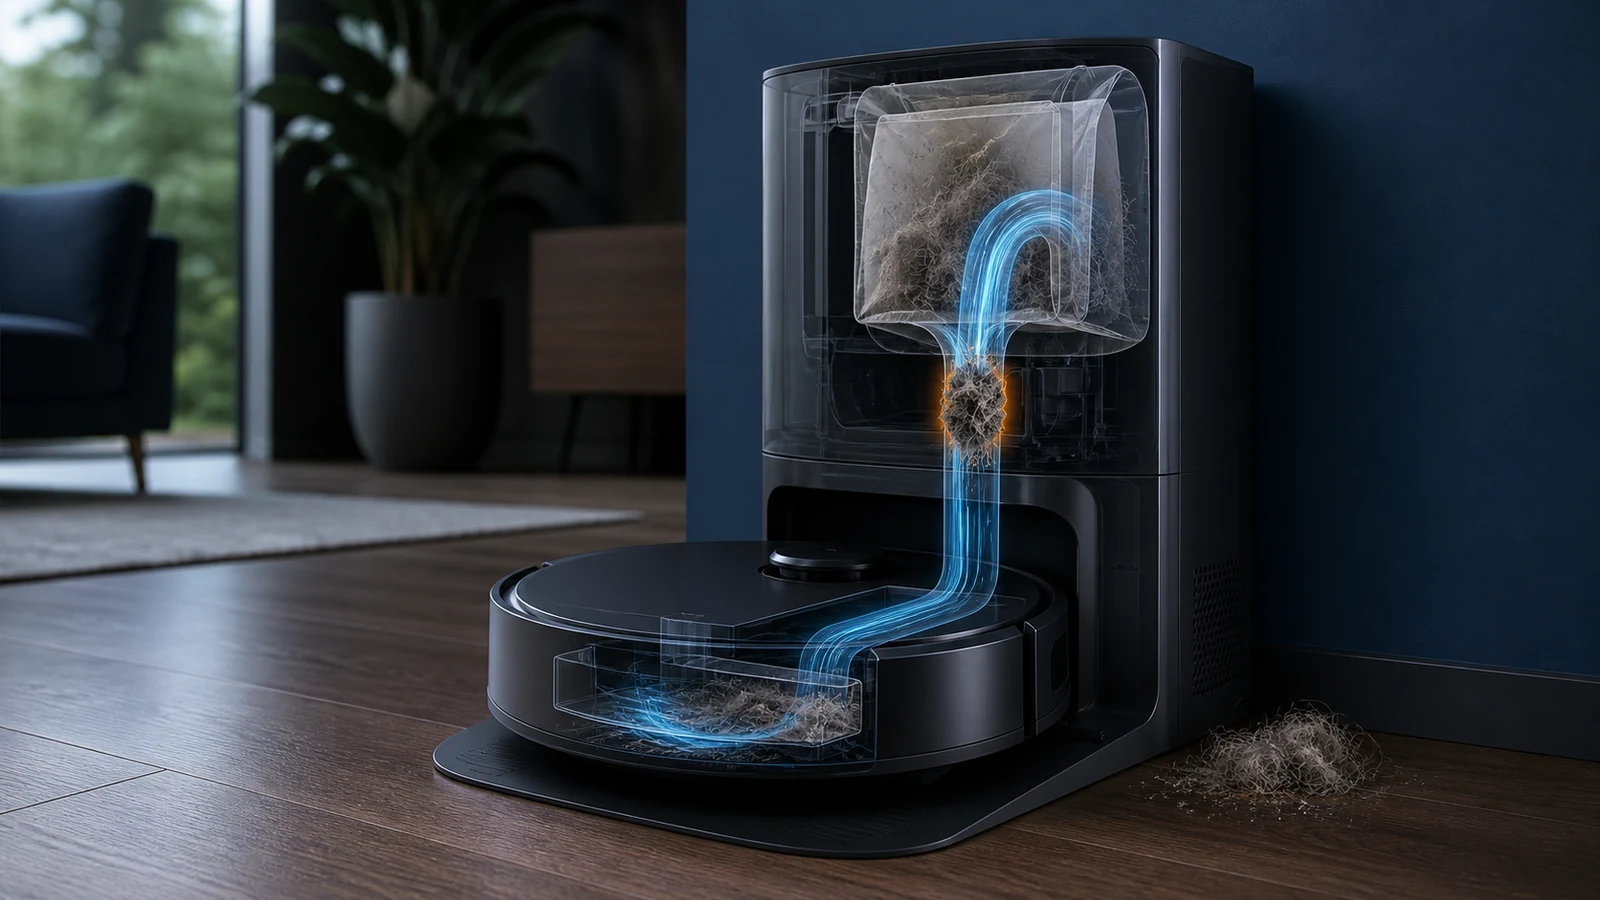
An all-in-one station can contain several different water paths:
- clean water from the dock tank to a mop-washing tray;
- dirty water from the tray to a recovery tank;
- clean water used to refill an onboard robot tank;
- water metered from the robot to its pad, rollers or mop assembly.
A station that washes the mop successfully does not prove the robot-side dispensing path is working. Conversely, a robot with a removable tank may dispense water without any dock washing system.
If the station itself is not washing or refilling, check its clean-water tank, dirty-water tank, filter, tray and App message using the station manual. This article focuses on water delivered by the robot during a mopping task.
1. Confirm the Exact Mopping Mode and Flow Setting
Verify that the robot is not in vacuum-only mode, a no-mop zone, a carpet-avoidance behavior or another state that intentionally stops water. Check the App's water-flow level and any room-specific cleaning preference.
The App interface can change with firmware updates, and model capabilities differ. Do not rely on a screenshot from another product. Record the selected mode and flow level before changing them, then run one controlled task on a suitable hard floor.
If the robot reports that the mop, tank or water module is missing, resolve that detection state before testing the pump.
2. Check the Correct Tank and Water Supply
Identify the water architecture before removing parts:
- Removable robot tank: confirm the correct tank is filled, capped, seated and recognized.
- Integrated robot tank: confirm the dock has completed any required refill process and the App does not report a refill fault.
- Combo dustbin and tank: confirm the combined module and any magnet or detection feature are present and correctly installed.
- Dock-fed mop system: verify the station's clean-water supply and refill prerequisites separately.
Use only the water and cleaning solution allowed by the exact manual. Hot water, concentrated detergent, disinfectant, essential oil or an unapproved chemical can deform a tank, block a filter, foam inside a pump or damage seals. “Water only” is also not a universal statement because some systems have a dedicated approved solution cartridge.
3. Inspect the Mop Holder and Pad
A water system can be working while the floor still looks dry because the pad is missing, incorrectly fitted, clogged with residue or unable to spread moisture evenly. Install the exact holder and pad in the correct orientation.
Some manuals instruct users to dampen and wring the mop before starting. Others pre-wet the mop at the station. Follow the model's procedure rather than soaking electronics or placing a dripping pad on a sensitive floor.
Check whether the pad is flat, attached across the intended surface and free from heavy detergent or mineral residue. Replace a damaged or incompatible pad; do not add holes or modify the backing to increase flow.
4. Run a Controlled Water-Flow Test
Use the manufacturer's test whenever available. Dreame support, for example, provides model-specific procedures that remove the mop pad, retain the appropriate holder and inspect for small droplets after a defined mopping interval. That procedure does not automatically apply to every robot.
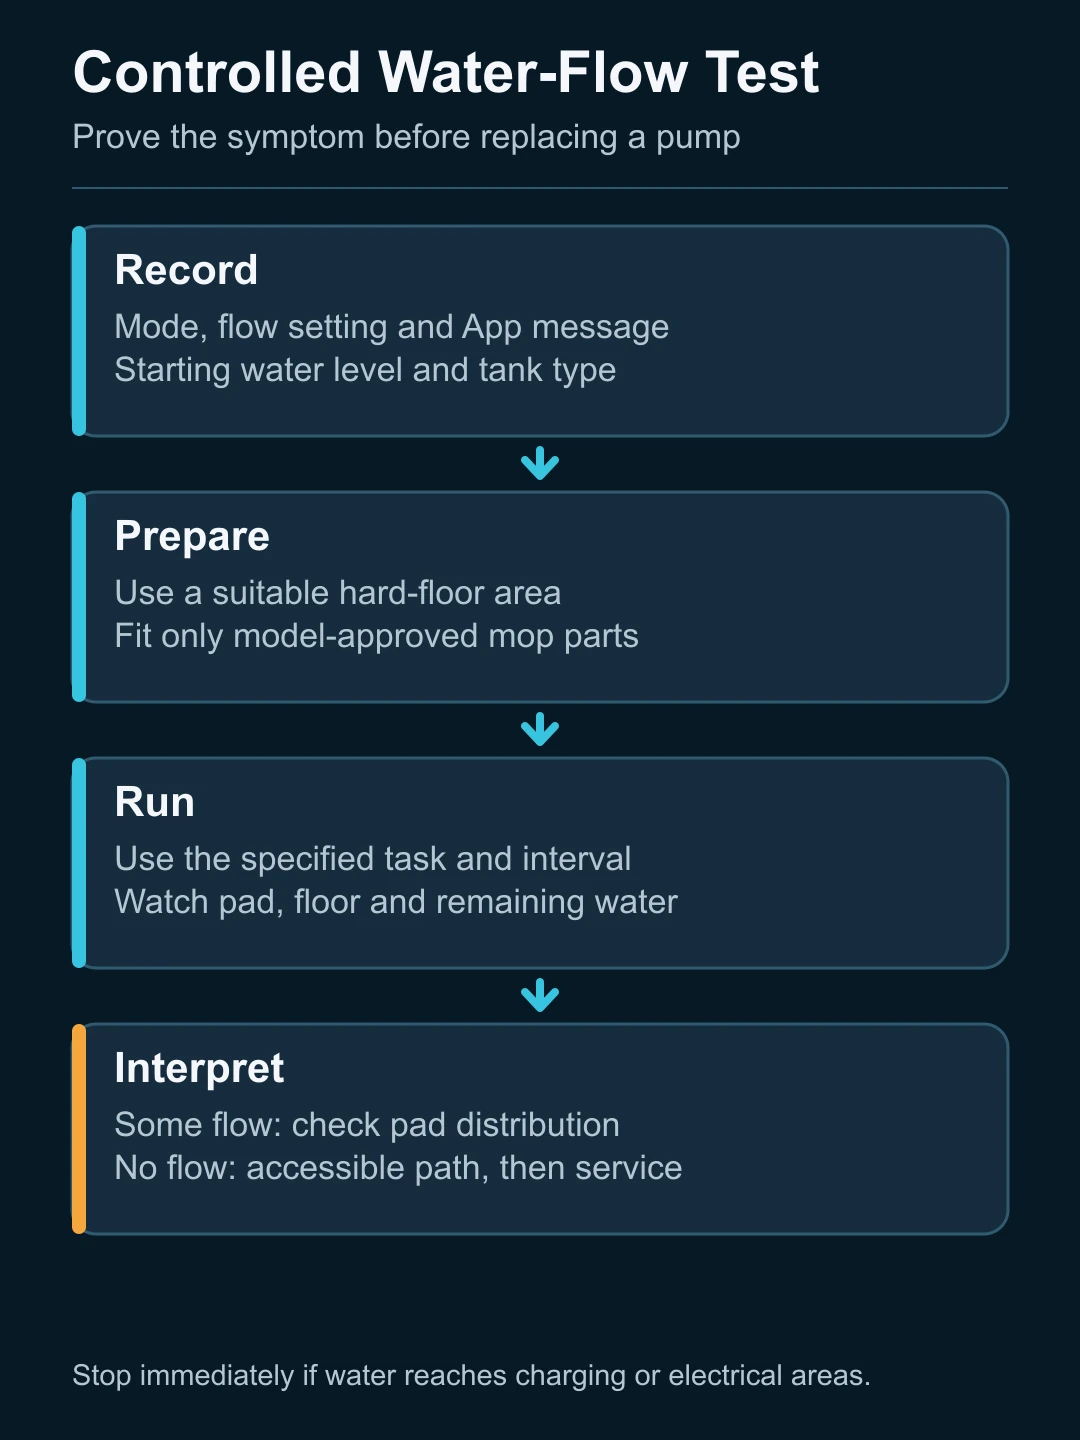
For a safe evidence record:
- note the starting water level and App setting;
- use a suitable hard-floor test area;
- install only the parts required by the exact procedure;
- run the specified mopping task for the specified interval;
- inspect the pad, floor pattern and remaining water;
- stop immediately if water reaches an unintended electrical or charging area.
Do not infer failure from the first few seconds. Some products initially rely on a pre-wet pad or meter water slowly.
5. Inspect User-Accessible Outlets, Vents and Filters
On a removable tank, a blocked outlet or cap vent can stop gravity or pump-assisted flow. An electronic system may also have a small filter or distribution opening. Clean only the locations and with the tools permitted by the manual.
Some official support instructions allow a toothpick or thin object for a named outlet; others do not. Never insert a tool blindly into a pump, valve or internal water line. Do not enlarge an opening, use compressed air against a sealed system or pour descaler through the robot without explicit approval.
If a filter is washable, let it dry for the required time. Do not assume every water-system filter or mop component is washable.
6. Check Tank Detection and Installation
A tank can be physically present but electronically unrecognized. Depending on the product, detection may use a magnet, switch, contact or software state. Remove and reinstall the module normally, listening or looking for the model's expected confirmation.
Inspect for a missing magnet, damaged latch, deformed cap, cracked tank or wet contact only where the manual identifies it as user-accessible. A persistent “tank missing” message with the correct module installed may require sensor or harness service.
7. Separate No Flow, Low Flow and Uneven Flow
These symptoms point to different parts of the system:
- No flow: wrong mode, zero setting, unrecognized tank, empty supply, closed vent, blocked outlet or pump/valve fault.
- Low flow: low setting, slow metering, partial restriction, pad saturation behavior or pump wear.
- Uneven flow: pad fit, one blocked outlet, distribution channel or floor contact.
- Intermittent flow: tank seating, air lock, refill timing, protection state or an internal electrical/control fault.
Do not replace the pump based only on a dry pad. Confirm the exact mode, tank, detection and accessible path first.
When to Stop and Use Service
Stop ordinary troubleshooting when:
- water leaks into the robot body, dock electronics or charging area;
- the tank, cap, seal, port or water line is cracked or deformed;
- an internal pump or valve runs abnormally, overheats or makes a new noise;
- a model-approved flow test confirms no output after accessible checks;
- the robot persistently fails to detect the correct tank;
- repair requires opening a sealed robot or mains-powered station.
Dry the exterior as the manual permits, isolate power where safe, and do not continue wet cleaning. Provide the model, serial number, firmware, tank or module part number, approved solution used, App message, starting and ending water level, and a short test video to support.
What Dealers and Brands Should Record
“Mop is dry” should not be treated as a single failure code. Record the water architecture, mode, flow setting, tank detection, pad type, dock refill or wash result, controlled flow test and location of any leak or restriction.
For sourcing and after-sales planning, the robot vacuum cleaners from China guide explains why tanks, pumps, docks, firmware and spare parts must be evaluated as a system. A related floor scrubber water-flow guide covers the same diagnostic principle in a different machine category without replacing this robot-specific page.
FAQ
Why is my robot vacuum mop dry even though the water tank is full?
Check that the robot is in a supported mopping mode, water flow is above zero, the tank is recognized, the mop holder and pad are installed correctly, and the approved outlet or vent is clear. A full tank alone does not prove the robot is metering water.
Should I wet the mop pad before starting?
Only if the exact manual instructs it. Some products expect a damp, wrung pad; others pre-wet the mop at the dock. Do not place a dripping pad near charging or electrical areas.
Can cleaning solution block a robot vacuum's water system?
An unapproved or overly concentrated product can foam, leave residue or damage seals and filters. Use only the water or solution specified for the exact model.
Why does the dock wash the mop but the robot leaves the floor dry?
Dock washing and robot-side dispensing are different water paths. Investigate onboard refill, mopping mode, tank detection, the robot outlet, pad and internal pump after confirming the station wash cycle works.
Can I clear a robot vacuum water outlet with a needle?
Only use the tool and location specifically permitted by the manufacturer. A thin object is approved for certain named outlets, but inserting it into an unknown port can damage a valve, pump or line.
Final Answer
When a robot vacuum is not dispensing water, confirm the exact mopping mode and flow setting, identify whether the robot has a removable, integrated or dock-refilled tank, and verify tank detection, mop-holder installation and pad condition. Then run the model-approved flow test and clean only the specified outlet, vent or filter.
Keep unapproved chemicals, hot water and blind outlet probing out of the system. Stop for leaks, electrical exposure or a confirmed internal pump, valve, sensor or water-line fault and use authorized service.