- First separate a robot that cannot find or align with its dock from one that is correctly docked but not receiving charge.
- Check dock power, accessible contacts, seating and model-specific temperature or error messages before assuming the battery has failed.
- Stop use for swelling, unusual heat, burnt odor, liquid intrusion or damaged charging equipment, and keep internal battery, BMS and charging-circuit work within authorized service.
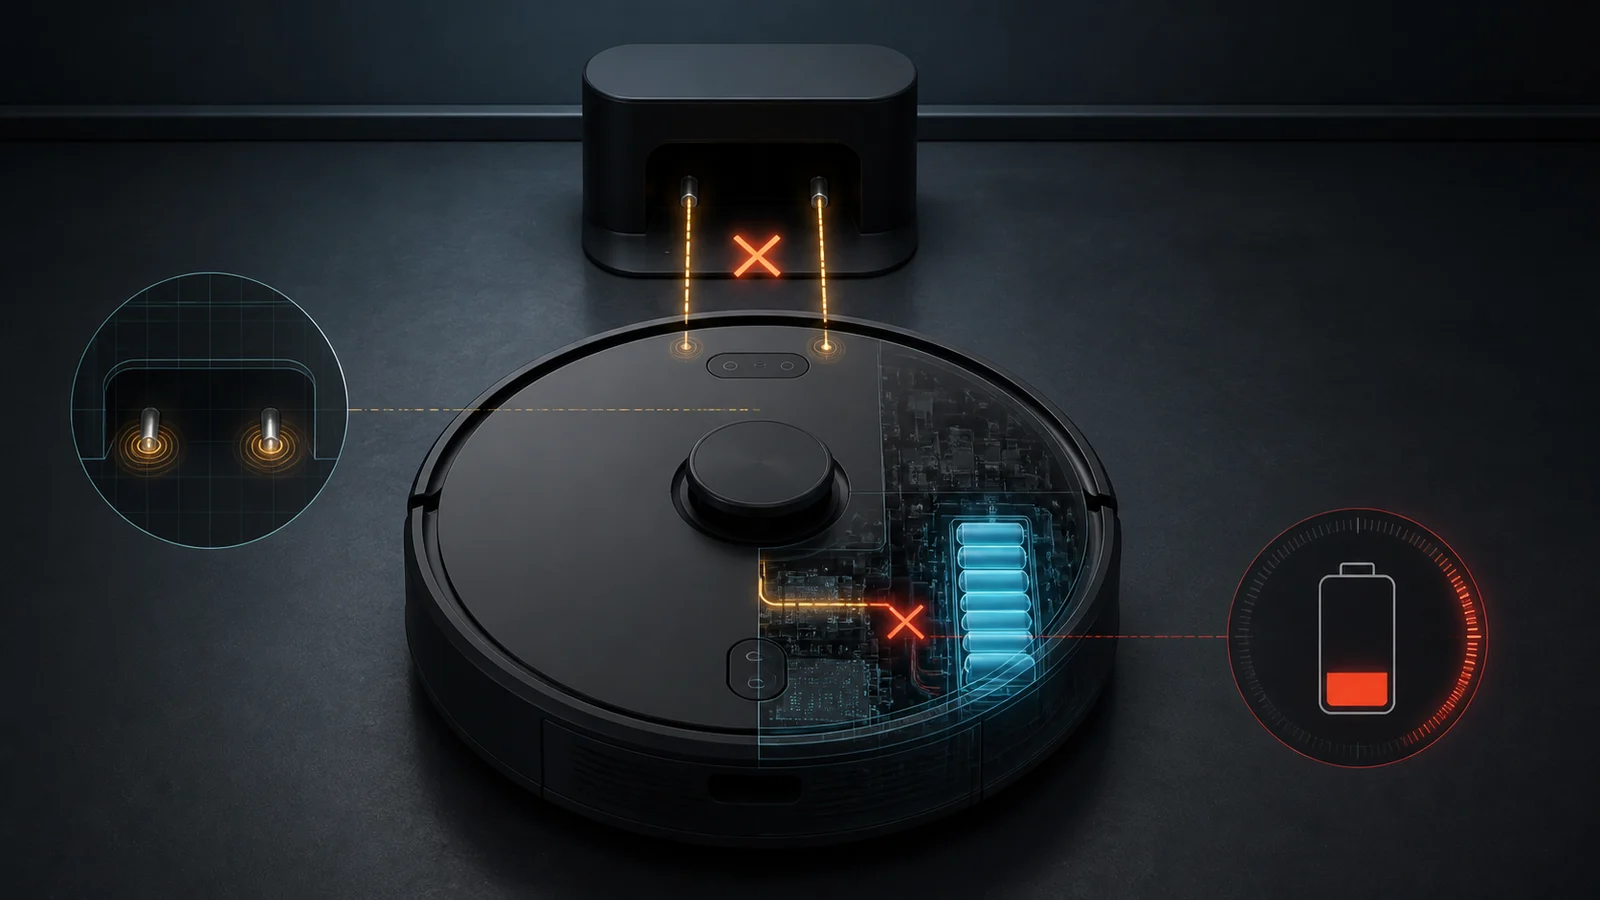
If your robot vacuum is not charging, first determine whether it reaches and seats correctly on the dock. A robot that cannot find the base has a navigation or docking problem. A robot that is already aligned but does not gain battery charge points instead to dock power, dirty or unstable contacts, temperature protection, the battery or an internal charging fault.
Do not order a battery from the symptom alone. Record the dock light, robot indicator, App battery percentage, exact error and whether charging begins when the robot is placed normally on the dock. Stop ordinary troubleshooting if there is swelling, unusual heat, a burnt smell, damaged insulation, liquid where it should not be or evidence that the charging equipment has been physically damaged.
Robot Vacuum Charging Problems at a Glance
| What you observe | Most likely area to investigate | First safe check |
|---|---|---|
| Robot cannot find the dock | Dock placement, power, map, sensors or route | Confirm the powered dock is visible and the approach is clear |
| Robot reaches the dock but repeatedly backs away | Alignment, ramp, contacts, wheels or dock movement | Inspect normal seating without forcing the robot |
| Robot is docked but no indicator reacts | Outlet, power cord, dock switch, dock or contact path | Confirm the external power path and dock status |
| Charging appears briefly, then stops | Contact stability, temperature, dock power or internal fault | Record when the status changes and whether movement affects it |
| App says charging but percentage does not rise | Display delay, unstable connection, battery or charging circuit | Record percentage and indicators over the model-approved interval |
| Robot reports a temperature warning | Model-specific battery protection | Follow the exact manual's permitted charging environment |
| It reaches full charge but runtime is very short | Incomplete charge, battery aging, high load or power-system fault | Separate the charging complaint from a controlled runtime test |
| No charge after long storage | Deep discharge, protection state, battery or charger | Use only the exact post-storage procedure and approved equipment |
LED colors, charge times, temperature limits, cleaning methods and reset sequences vary by model. Treat the table as a diagnostic map, not as a universal repair manual.
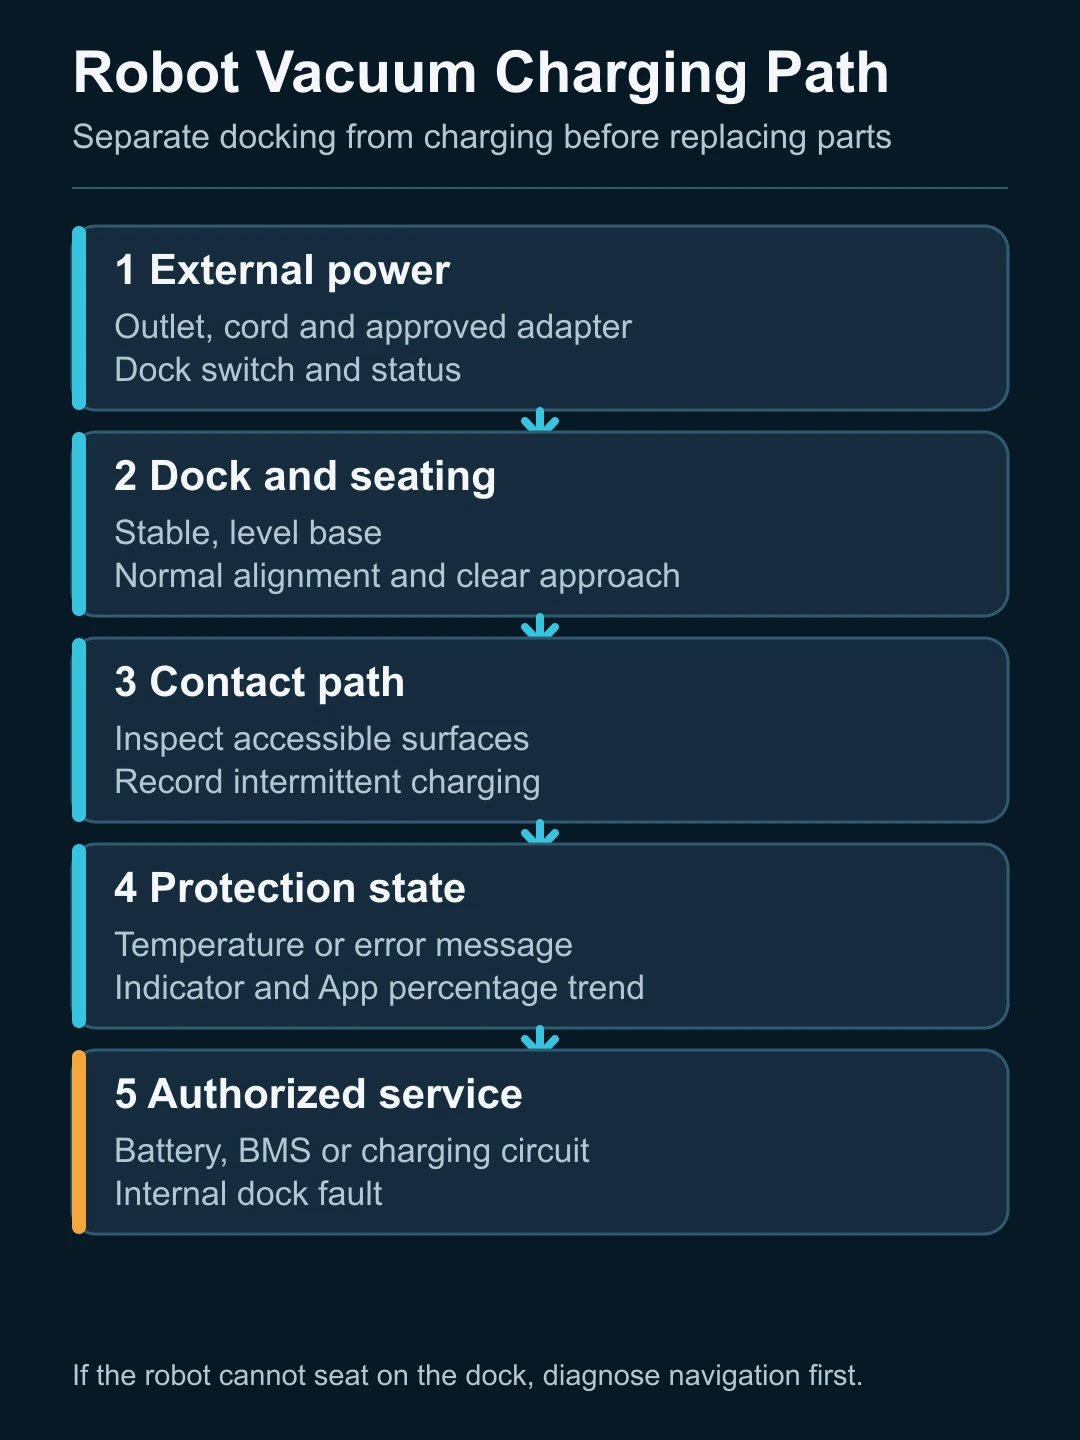
First Separate Docking from Charging
"Not charging" often describes two different failures.
In a docking failure, the robot cannot reach, recognize or sit correctly on the base. It may stop elsewhere, circle the dock, approach at an angle or repeatedly reverse. Investigate dock placement, obstacles, floor level, the approach path, sensors, mapping state, wheel movement and whether the dock is powered.
In a charging failure, the robot is correctly seated but the expected charging state does not begin or remain stable. Investigate the external power path, accessible charging surfaces, alignment, temperature or protection messages, the battery and internal electronics.
The distinction matters because a new battery cannot repair a robot that never makes reliable contact with its base. It also keeps this page separate from the planned navigation guide about a robot vacuum that cannot return to its dock.
Record the Failure Before Resetting Anything
A restart can remove the most useful evidence. Before changing settings, record:
- complete model and market version;
- serial number and proof of purchase;
- dock or base model and its power-adapter identity;
- dock indicator before and after the robot arrives;
- robot light, sound, screen message and App error;
- battery percentage when docked and after a controlled interval;
- whether charging changes when the robot is normally reseated;
- last successful charge, recent storage and any firmware change;
- visible contamination, corrosion, deformation or liquid;
- a short video showing the robot approaching and sitting on the dock.
This evidence is useful for owners, dealers and service teams. It also prevents a dock, power supply and robot from being exchanged repeatedly without locating the failed stage.
Check the Dock's External Power Path
Begin outside the robot. Confirm that the outlet, cord, adapter, dock switch and status indicator match the exact manual. Do not assume that a cable is correct because its connector fits.
Dreame's current L10s Ultra charging support separates base-station power from poor contact between the robot and station. Roborock's QV/QR series manual likewise lists an unpowered dock and poor contact as separate causes.
Use those as category evidence, but retain the model boundary. Power switches, adapters, indicators and allowed checks differ across products and markets.
If the dock has no expected status:
- inspect the accessible cord and plug for damage;
- verify both ends are fully connected as the manual shows;
- confirm any external dock switch is in the required position;
- use only the approved outlet test or qualified electrical help;
- stop if the adapter, cable or dock is hot, damaged, wet or smells burnt.
A lit dock proves only that part of the external path has power. It does not prove that the charging output, contact path, battery-management system or battery is healthy.
Inspect Alignment and Accessible Charging Contacts
Robot vacuums use different contact locations, spring mechanisms, ramps and docking geometries. Inspect only the surfaces assigned to user care in the model's manual.
With power isolated where instructed:
- remove loose dust or hair using the approved dry or model-specific method;
- check that spring-loaded pins move normally only if the manual permits that check;
- look for pitting, corrosion, deformation or a contact stuck below its normal position;
- confirm the dock sits on a stable, level surface and does not slide;
- inspect wheels and the front caster for debris that changes the robot's height;
- place the robot on the dock without forcing, wedging or holding it at an angle.
Eufy's L35/LR30/LR20 charging guidance uses deliberate contact alignment as part of its model-specific procedure. That does not mean every contact is safe to touch or clean in the same way. Follow the exact product instructions.
If charging works only when pressure is applied or the robot is held in one position, stop treating it as a cleaning issue. The contact, spring, dock geometry or internal connection may require service.
Temperature and Battery Protection
A lithium battery can delay, slow or refuse charging outside its permitted temperature range. The relevant limit belongs to the exact model, not to the robot-vacuum category as a whole.
Roborock's QV/QR manual, for example, distinguishes "unable to charge" from "slow charging" and says high or low temperature can reduce charging speed. Do not copy that model's numerical range to another product.
When a temperature or protection message appears:
- preserve the exact message and ambient condition;
- stop if the robot or battery area is unusually hot;
- move the intact product only to the environment permitted by its manual;
- allow the specified recovery process;
- escalate a recurring warning instead of repeatedly cycling power.
Never heat, cool, open, puncture, jump-start or bypass a sealed battery pack or BMS.
Indicators and App Percentages Are Evidence, Not Proof
A robot may show four different layers of state:
- the dock detects physical contact;
- the robot displays a charging state;
- the App reports a rising percentage;
- the stored energy supports a normal cleaning run.
These layers can disagree. A charging icon with no increase may reflect an unstable connection, software reporting issue, battery condition or internal charging fault. An immediate "full" state followed by a short run does not prove a successful charge.
Record the original values before removing and re-adding the robot in the App, resetting Wi-Fi or updating firmware. Network troubleshooting belongs in the separate robot vacuum Wi-Fi guide; charging should still be verified from the robot and dock even when the App is offline.
When the Battery Becomes the Leading Suspect
Battery degradation becomes more plausible when:
- the approved dock and adapter are powered and stable;
- contacts are clean, undamaged and correctly aligned;
- charging begins normally but capacity or runtime remains very low;
- the fault follows the robot across a verified compatible dock under service control;
- a model-specific battery error persists;
- the product has a documented storage or cycle history consistent with degradation.
These observations still do not authorize an arbitrary replacement pack. Verify the exact part number, voltage, battery-management compatibility, enclosure sealing, warranty responsibility and who is allowed to perform the work.
World Clean Biz's robot vacuum manufacturing cost guide explains why the battery, charger, dock, electronics and software are a system rather than interchangeable commodity parts.
When to Stop and Use Authorized Service
End user-level troubleshooting when there is:
- swelling, smoke, melting, unusual heat or burnt odor;
- liquid intrusion or corrosion beyond routine accessible cleaning;
- damaged insulation, plug, adapter, dock or charging surface;
- a contact that is loose, stuck, burned or mechanically damaged;
- a recurring temperature or internal battery warning;
- no charge after the complete approved external sequence;
- a need to open the battery, dock, charger or robot enclosure;
- uncertainty about the correct battery, adapter or market version.
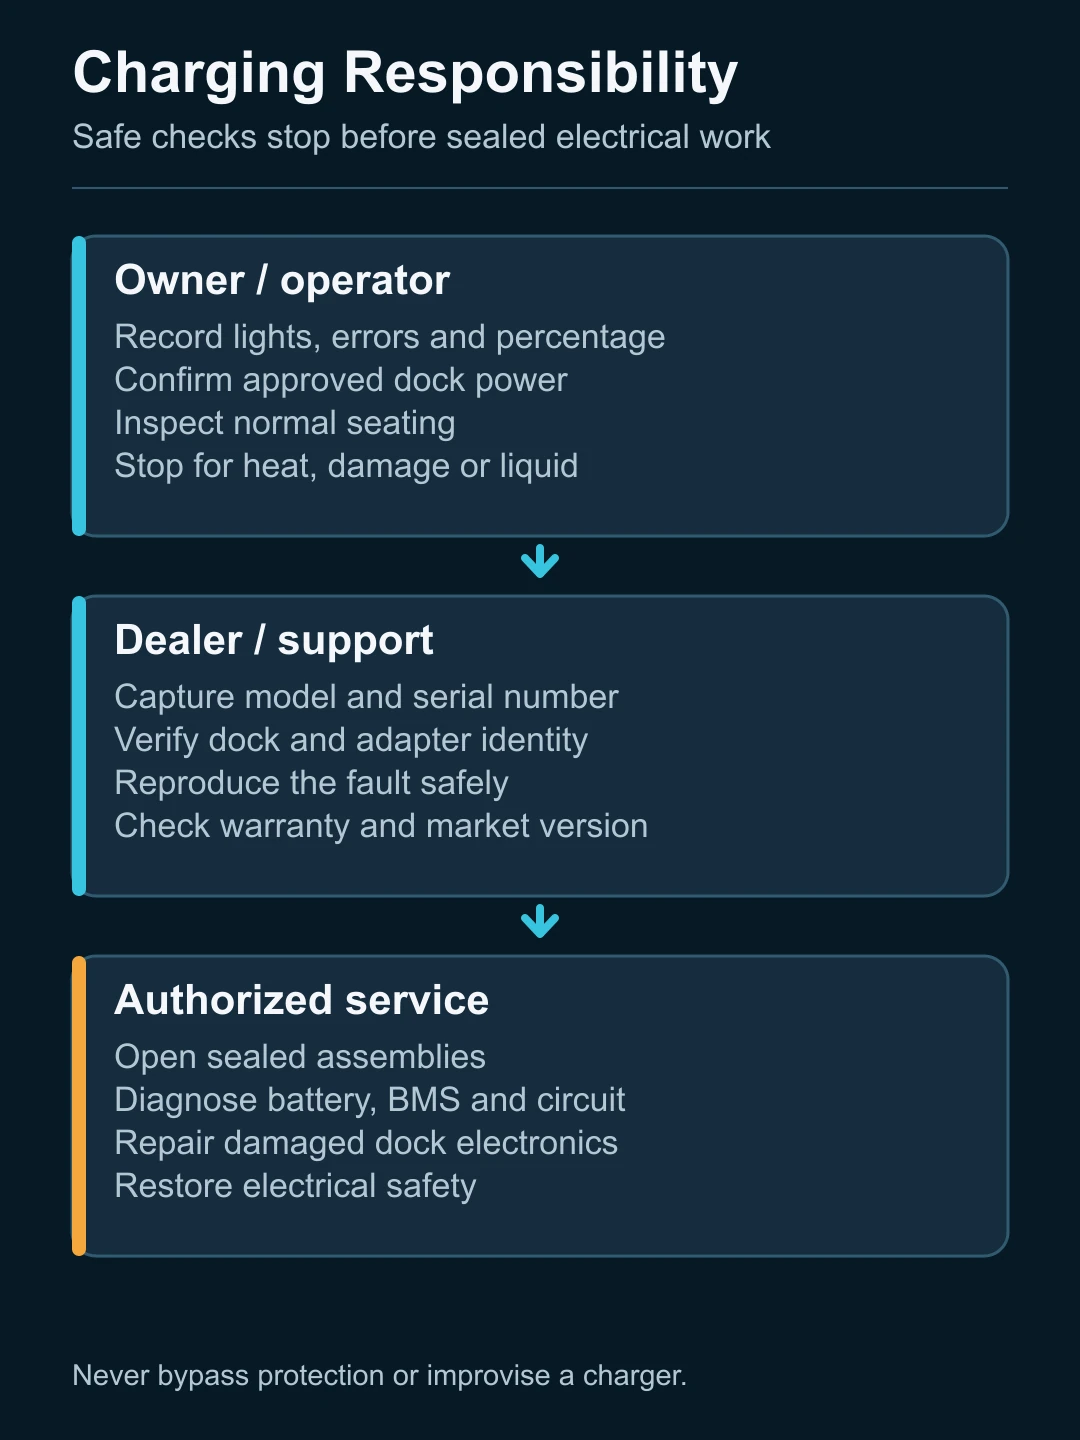
Dealers should capture the complete product identity, supplied accessories, fault video and attempted steps before approving a part. After service, verify a full charge and representative cleaning cycle rather than relying only on an indicator light.
FAQ
Why is my robot vacuum on the dock but not charging?
The dock may lack power, the contacts may be dirty or misaligned, the robot may not be seated correctly, temperature protection may be active, or the battery or internal charging circuit may have failed. Check the external path and exact error before replacing parts.
Can dirty charging contacts stop a robot vacuum from charging?
Yes. Multiple manufacturers list poor or dirty contact as a charging cause. Clean only as the exact manual permits, and stop if the surface is burned, deformed, corroded or works only under pressure.
Does a robot vacuum need a new battery if it will not charge?
Not necessarily. An unpowered dock, wrong adapter, poor alignment, damaged contact, temperature state or internal charging fault can produce the same symptom.
Why does my robot vacuum charge slowly?
Some models reduce charging speed at high or low temperatures, and dirty or unstable contacts can also interrupt charging. Use the exact model's indicator and environment guidance.
Can I use a different charger or dock?
Only when the manufacturer or responsible service party confirms compatibility for the complete model and market version. Connector shape alone does not establish electrical or control compatibility.
When should I stop using the robot?
Stop for swelling, smoke, melting, unusual heat, burnt odor, damaged electrical equipment or suspected liquid intrusion. Keep internal battery and charging-system work within authorized service.
Final Answer
When a robot vacuum will not charge, separate docking from charging, record the original indicators and then trace the external path: outlet, approved adapter, powered dock, normal seating and accessible contacts. Follow model-specific temperature and reset instructions, and do not treat a battery replacement as the first universal fix.
If the external checks pass but charge does not begin or remain stable, preserve the evidence and escalate the dock, battery and internal charging path to the responsible service party.