- Use a recurring schedule for the cutting system, wheels, sensors, charging contacts, station and navigation infrastructure instead of waiting for a fault.
- Power the mower off and follow the exact model manual before cleaning or blade work; never assume that water, blade or battery instructions transfer across brands.
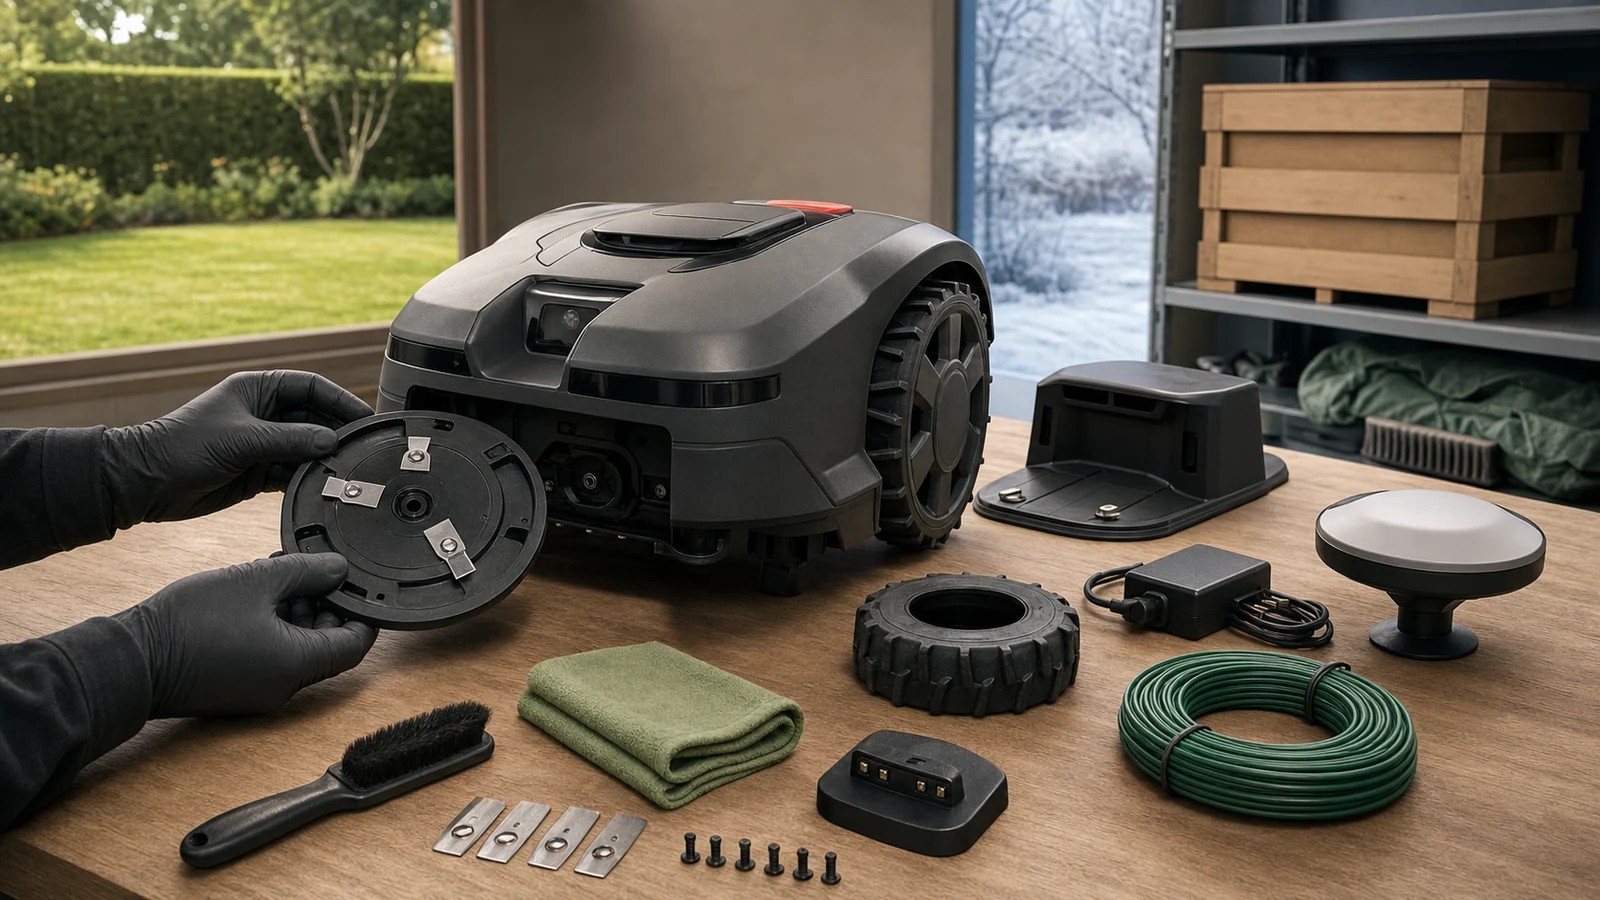
- Winterize the complete system—mower, battery, dock, power supply, boundary or RTK equipment, connectors, maps and service records.
In this article 17 sections
A robot lawn mower maintenance checklist should cover more than blades and grass clippings. The complete system includes the cutting disc, wheels, bearings, bumper, lift and tilt protection, charging contacts, station, power supply, boundary wire or RTK/GNSS hardware, cameras or LiDAR, maps, firmware, battery and service records. Inspect on a recurring schedule, stop operation when a safety-critical defect appears, and follow the exact model manual for water cleaning, blade hardware, battery charge and winter storage.
Use the schedule below as a minimum operating system. A wet, sandy, steep or obstacle-heavy site will need shorter intervals. A lightly used residential lawn may need less work. Manufacturer instructions always override a general checklist.
Printable Robot Lawn Mower Maintenance Schedule
| Frequency | Mower tasks | Site and station tasks | Record |
|---|---|---|---|
| Before each run or schedule period | Check for visible damage, loose covers, blocked sensors and abnormal blade noise | Remove toys, stones, wire, branches and new holes; confirm station path is clear | Exceptions only |
| After a wet or dirty session | Remove heavy grass buildup when safe; inspect wheels, underside and charging area | Clear leaves and mud around station; check drainage | Cleaning / defect |
| Weekly during active season | Inspect complete blade set, screws, disc movement, wheels, bumper, lenses and contacts | Inspect dock alignment, power cable, boundary exposure or RTK/GNSS obstruction | Pass / correct / stop |
| Monthly or by operating hours | Deep clean as the model permits; inspect wear, seals, fasteners and charging behavior | Review map, zones, schedules, firmware, connectivity and landscape changes | Hours, parts, software |
| End of season | Clean, dry, inspect, service blades, prepare battery and power off | Winterize station, supply, wires, antennas and exposed connectors | Storage checklist |
| Spring restart | Inspect before charging and test safety, docking and a small zone | Reinstall infrastructure, review map and clear the lawn | Commissioning record |
“Weekly” and “monthly” are operating checkpoints, not universal replacement intervals. Use hours, conditions, inspection results and the exact manual to change the frequency.
Safety Before Maintenance
The cutting system can move unexpectedly if the mower is awake, scheduled or remotely commanded.
Before touching the underside:
- Stop the mower on a stable, dry surface.
- Disable the schedule or place the unit in its service state.
- Power it off using the procedure in the manual.
- Remove the safety key or detachable battery if the model requires it.
- Disconnect the station before station work.
- Wear cut-resistant gloves for blade and deck inspection.
- Keep the mower secure when turning or lifting it.
- Use the specified lifting points and orientation.
Do not rely on an App pause alone. Do not work under an energized machine. Do not bypass lift, tilt, bumper, PIN or other safety systems to make a fault disappear.
Stop using the mower and escalate if you find:
- a cracked blade disc, blade carrier, guard, chassis or enclosure;
- a missing, loose or incompatible blade screw;
- severe vibration, impact noise or metal-on-metal contact;
- damaged battery housing, swelling, leakage, unusual heat or odor;
- burned, melted or repeatedly overheating charge contacts;
- failed lift, tilt, collision or emergency-stop behavior;
- water inside an enclosure or a damaged seal;
- wheel, axle or bearing looseness that affects control.
Cleaning is not a repair for a safety-critical defect.
Before Every Run: Inspect the Lawn First
A robot mower meets new conditions every day. A safe installation can become unsafe after gardening, storms, pets, children, utility work or erosion.
Walk the work area and remove:
- toys, hoses, cables and small tools;
- stones, pine cones and fallen branches;
- fabric, netting, pet leads and string;
- fruit, heavy leaf piles and dense windfalls;
- sprinkler parts or edging that have moved;
- objects hidden in tall grass;
- new holes, exposed roots or soft ground.
Check narrow passages, steep transitions, ponds, retaining edges, roads and public access points. Confirm that exclusion zones still cover permanent risks.
For boundary-wire systems, look for loose stakes, exposed wire and recent digging. For virtual-boundary systems, consider whether trees, structures, antenna movement or landscape changes can affect positioning. A map is not permanent evidence that the physical lawn is still safe.
Cleaning: Brush First and Use Water Only When Approved
Grass buildup can restrict disc movement, increase drag, hold moisture and interfere with wheels or docking. The safest general method is:
- power off;
- wear gloves;
- remove loose clippings by hand away from the blades;
- use a soft brush for the deck, disc, guards and wheels;
- use a soft damp cloth for body panels and sensor windows;
- dry the mower before charging or storage.
Never use a high-pressure washer. Water can be driven past seals and into bearings, motors, electronics or connectors.
Low-pressure hose rules vary. Husqvarna’s current cleaning guide lists particular models that may be rinsed with running water while warning that other models may not. Mammotion’s LUBA guidance warns against washing the underside with a washer while the mower is upside down. Navimow’s X3 winter guide permits a hose for that specific platform.
Therefore:
- no manual confirmation: use brush and damp cloth;
- manual explicitly permits a hose: follow its orientation, pressure and drying steps;
- pressure washer: do not use.
Avoid solvents, aggressive degreasers, sharp scraping tools and lubricant on sensors or charge contacts. Apply any corrosion product only where the manufacturer allows it.
Weekly Cutting-System Check
Blades should cut grass cleanly and the disc should rotate without abnormal resistance.
Inspect:
- every blade in the set;
- blade edges, chips, bends and corrosion;
- screws and mounting holes;
- free movement of pivoting blades;
- disc, skid plate or guard clearance;
- grass or string wrapped around the hub;
- vibration and sound during a controlled test.
Replace a blade set when it is damaged, badly worn or producing frayed, pale grass tips. Operating hours alone are not enough. Grass type, soil, sand, sticks, stones, lawn size and mowing frequency change wear.
Husqvarna’s current blade guide says to replace screws with blades, avoid mixing blade types or old and new blades on one disc, and confirm that pivoting blades move freely. Those instructions are correct for the named Automower system; other platforms may use a larger fixed blade or a different fastener.
Use this decision:
| Condition | Action |
|---|---|
| Light grass residue, blade undamaged | Clean and recheck free movement |
| Dull, chipped, bent or corroded blade | Replace according to model instructions |
| One blade missing or mismatched | Stop; replace the balanced set and required hardware |
| Disc cracked, warped or rubbing | Stop; service the cutting assembly |
| Abnormal vibration after correct replacement | Stop; check disc, mounts, bearings and installation |
Do not sharpen a small pivoting blade unless the manufacturer specifically permits it. Material removal can change balance, geometry and safety behavior.
Wheels, Bearings, Bumper and Chassis
The drive system determines whether the robot follows its map, climbs slopes and returns to charge.
Each week:
- remove compacted grass from wheel treads;
- check caster or front-wheel rotation;
- feel for side play, binding or rough bearings;
- inspect tire damage and missing tread features;
- press and release the bumper around its travel;
- check that body movement and suspension return normally;
- inspect the chassis for impact marks and cracks.
Repeated wheel slip is not always a wheel defect. Wet soil, steep slopes, ruts, worn tread, an overloaded deck or an incorrect boundary can create the same symptom. Record where the problem occurs before replacing parts.
For commercial or multi-site fleets, log traction complaints by zone. A cluster at one slope or drainage area points to a site correction; failures across different sites point more strongly to the machine or wear state.
Sensors, Cameras, LiDAR and Positioning Hardware
Clean sensing surfaces with a soft, non-scratching cloth:
- camera lenses;
- LiDAR windows and covers;
- ultrasonic or proximity sensor openings;
- cliff, lift or ground sensors;
- rain sensors where fitted;
- dock infrared windows;
- GNSS or RTK equipment surfaces.
Do not use polish, oily cleaners or abrasive pads. A clear-looking film can still scatter light or collect dust.
Then review the system:
- Has the station, antenna or reference point moved?
- Is foliage blocking sky view or line of sight?
- Has a building, fence or metal object changed the local environment?
- Are virtual boundaries aligned with the physical lawn?
- Are no-go zones still present?
- Did a firmware or map update change behavior?
- Is the mower using the expected positioning mode?
Clean first, but do not keep resetting a machine with repeatable localization or obstacle-detection failures. Save logs, photos, times, zones and firmware versions for support.
Charging Contacts, Station and Power
Charging problems often begin as a system issue rather than a failed battery.
Inspect:
- mower and dock contact surfaces;
- spring-loaded pins or mechanical alignment;
- station level and anchoring;
- leaves, mud or grass in the approach path;
- cable strain, cuts and connector seals;
- power-supply condition and ventilation;
- station indicator or error state;
- signs of heat, arcing, pitting or corrosion.
Disconnect power before cleaning the station. Use only the contact-cleaning method authorized for the exact model. If contacts are burned, melted, loose or repeatedly hot, stop charging and arrange service.
For a structured fault path, use Robot Lawn Mower Not Charging. Keep troubleshooting and preventive maintenance separate: a checklist reduces risk, but it does not prove that a battery, charger or mainboard is healthy.
Battery Care During the Mowing Season
The best routine is usually to let the mower and approved charging system manage normal cycles.
Support battery health by:
- keeping charging contacts clean;
- maintaining sharp blades to reduce unnecessary cutting load;
- clearing wheel and deck resistance;
- keeping the station within its allowed environment;
- avoiding unauthorized chargers or battery packs;
- investigating repeated early returns or incomplete missions;
- recording runtime trends under comparable lawn conditions.
Do not diagnose battery capacity from one short session. Grass growth, wetness, slope, cutting height, route efficiency, temperature and wheel slip all affect mission time.
Battery replacement is service work on many platforms. If a pack is swollen, wet, damaged, unusually hot or odorous, isolate it from use and follow the manufacturer and local battery-handling guidance. Do not open the pack.
Monthly Digital Maintenance
Robot-mower maintenance now includes software and data.
Once a month during the season:
- Record the mower model, serial number and firmware version.
- Review available firmware notes before updating a fleet.
- Confirm schedules match grass growth and local restrictions.
- Review work areas, channels, no-go zones and transport paths.
- Check whether logs show repeated docking, positioning or obstacle faults.
- Confirm owner, installer and service accounts are still accessible.
- Export or capture the map and configuration if the platform permits it.
- Check cellular, Wi-Fi, RTK or cloud subscription status where applicable.
For a single home, this prevents spring surprises. For a dealer or contractor, it creates evidence for warranty decisions and identifies common failures across an installed base.
End-of-Season Winter Storage Decision Tree
Start with the exact model’s manual and current support page.
1. Does the lawn still need mowing?
Stop when grass growth and ground conditions no longer support safe mowing. Do not run the robot on frozen, snow-covered or waterlogged ground merely to reach a calendar date.
2. What battery state does the model require?
This is not universal.
- Husqvarna’s current winter-storage guide says to fully charge most Automower models before switching them off.
- Segway Navimow’s X3 guide specifies at least 85% for X3.
- Other models can specify a different state or periodic charging.
Use the current manual for the exact model and battery generation. Record the stored charge and date.
3. How should the mower be cleaned?
Remove grass and soil, inspect wear, service the blades as specified and allow the unit to dry completely. Never trap wet grass in a winter box.
4. What stays outdoors?
Separate each component:
- mower;
- charging tower or head;
- base plate;
- power supply;
- boundary and guide wires;
- exposed wire ends;
- RTK/GNSS antenna and mounting pole;
- signal-enhancement antenna;
- connectors and extension cables;
- mower garage.
Some buried wires, poles, base plates or weatherproof reference stations may stay. Power electronics and exposed connectors often require indoor storage or protection. Do not copy a rule from another brand.
Mammotion’s LUBA winter guide, for example, treats the mower, charging station, RTK station, cable and adapter as one storage system. Husqvarna and Navimow distinguish removable heads, plates, antennas and installed wires differently.
5. Is the storage space suitable?
Use a dry, secure, frost-protected location within the manufacturer’s allowed temperature range. Store the mower in its specified orientation, protected from impact, pests, moisture and unauthorized access.
Record PIN, anti-theft or GeoFence requirements before moving the machine outside its normal area.
Winter Storage Checklist
- [ ] Exact model manual and current support page saved.
- [ ] Final operating faults reviewed before shutdown.
- [ ] Battery charged to the model-specific storage state.
- [ ] Schedule disabled and mower powered off correctly.
- [ ] Mower, deck, wheels and sensing surfaces cleaned.
- [ ] Machine fully dry.
- [ ] Blades and required screws serviced as specified.
- [ ] Wear, cracks, bearings, seals and contacts inspected.
- [ ] Station disconnected using the approved sequence.
- [ ] Boundary/guide wires labeled and ends protected.
- [ ] RTK/GNSS, antenna and connector plan completed.
- [ ] Power supply and required electronics moved indoors.
- [ ] Maps, settings, PIN, firmware and service record captured.
- [ ] Storage date, charge state and location logged.
Spring Restart Checklist
Do not place a stored mower directly into a full schedule.
- Inspect the mower and battery enclosure for damage, pests, moisture or corrosion.
- Confirm the blade set, screws, disc, wheels and safety features.
- Reinstall the station, power supply and positioning equipment.
- Reconnect labeled boundary and guide wires.
- Clean and inspect charging contacts before charging.
- Clear sticks, stones, leaves and new landscape hazards from the lawn.
- Review maps, zones, cutting height and schedules.
- Confirm App access and firmware state.
- Charge under observation according to the manual.
- Test stop, lift/tilt, bumper, docking and a small work zone.
- Start with a higher cutting height and lower gradually where appropriate.
- Record the commissioning result.
Husqvarna’s spring guide similarly emphasizes lawn debris, blades, charging, installation checks and a gradual cutting-height restart.
When Dealer Service Is Worth Paying For
Owner maintenance is appropriate for cleaning, visual inspection and user-replaceable parts when the manual provides a safe procedure.
Dealer service becomes valuable when the work requires:
- battery capacity testing;
- water-ingress or seal diagnosis;
- safety-function verification;
- wheel, bearing, motor or blade-drive repair;
- contact or power-system repair;
- electronic diagnostics and service tools;
- firmware recovery;
- RTK/GNSS installation correction;
- warranty documentation;
- winter storage without a suitable owner facility.
Husqvarna’s service description includes examples such as software updates, blade replacement, safety tests and winter storage. Service packages vary by dealer and country, so request the actual scope.
For a dealer, an annual package can combine inspection, cleaning, blade replacement, battery test, firmware, pickup, storage and spring commissioning. The value is not merely labor; it is traceability and fewer in-season failures. See robot mower dealer networks for the wider channel context.
Maintenance Log Template
| Date / hours | Site and weather | Task | Finding | Action / part | Firmware / map | Technician | Next due |
|---|---|---|---|---|---|---|---|
Attach:
- before/after photos;
- blade and screw part numbers;
- battery or diagnostic report;
- fault codes;
- station/antenna location change;
- warranty case number;
- storage charge and restart result.
A usable record distinguishes recurring site conditions from product failure and helps avoid replacing parts without evidence.
Final Maintenance Rule
Maintain the robot mower as an outdoor autonomous system, not as a small lawn tool. The blade disc, wheels, safety sensors, navigation, charging path, battery, station and installed infrastructure affect one another.
The most important habit is simple: inspect before faults accumulate, document changes, and never turn model-specific water, blade or winter-battery instructions into a universal rule. That discipline improves uptime, protects warranty evidence and gives owners or dealers a cleaner decision about when to continue, correct or stop.
For the separate life-cycle question, read How Long Do Robot Lawn Mowers Last?.
Frequently Asked Questions
How often should a robot lawn mower be cleaned?
Inspect it after wet or dirty sessions and on a recurring weekly basis during active use. Deep-clean frequency depends on grass, soil, rain, operating hours and the exact model. Follow the manual for allowed tools and water exposure.
Can I wash a robot mower with a hose?
Only if the exact model’s current instructions allow it. Some models can be rinsed with low-pressure running water; others should be cleaned with a brush and damp cloth. Never use a high-pressure washer.
How often should robot mower blades be replaced?
There is no universal interval. Inspect for frayed grass tips, dullness, chips, bends, corrosion and vibration. Replace the complete balanced set and required hardware according to the model instructions.
Should a robot mower battery be full for winter storage?
Not always. Some current Husqvarna guidance says full charge; Navimow X3 specifies at least 85%; other products may differ. Use the exact model manual and record the stored charge.
Can the charging station stay outside in winter?
It depends on the product. A base plate, buried wire or weatherproof antenna may be allowed to stay while the tower, power supply or exposed connectors move indoors. Follow the component-by-component instructions.
What should be tested when the mower comes out of storage?
Inspect the machine, reinstall the station and positioning hardware, verify maps and schedules, charge under observation, then test safety functions, docking and a small work zone before enabling the full schedule.