- Confirm a working outlet, the exact approved charger and a complete physical connection before blaming the battery.
- Charging lights are model-specific; record the pattern and compare it with the exact manual instead of applying another brand's color code.
- Stop using a cracked, swollen, leaking, unusually hot or burnt-smelling battery, charger or vacuum and move the diagnosis to authorized service.
In this article 14 sections
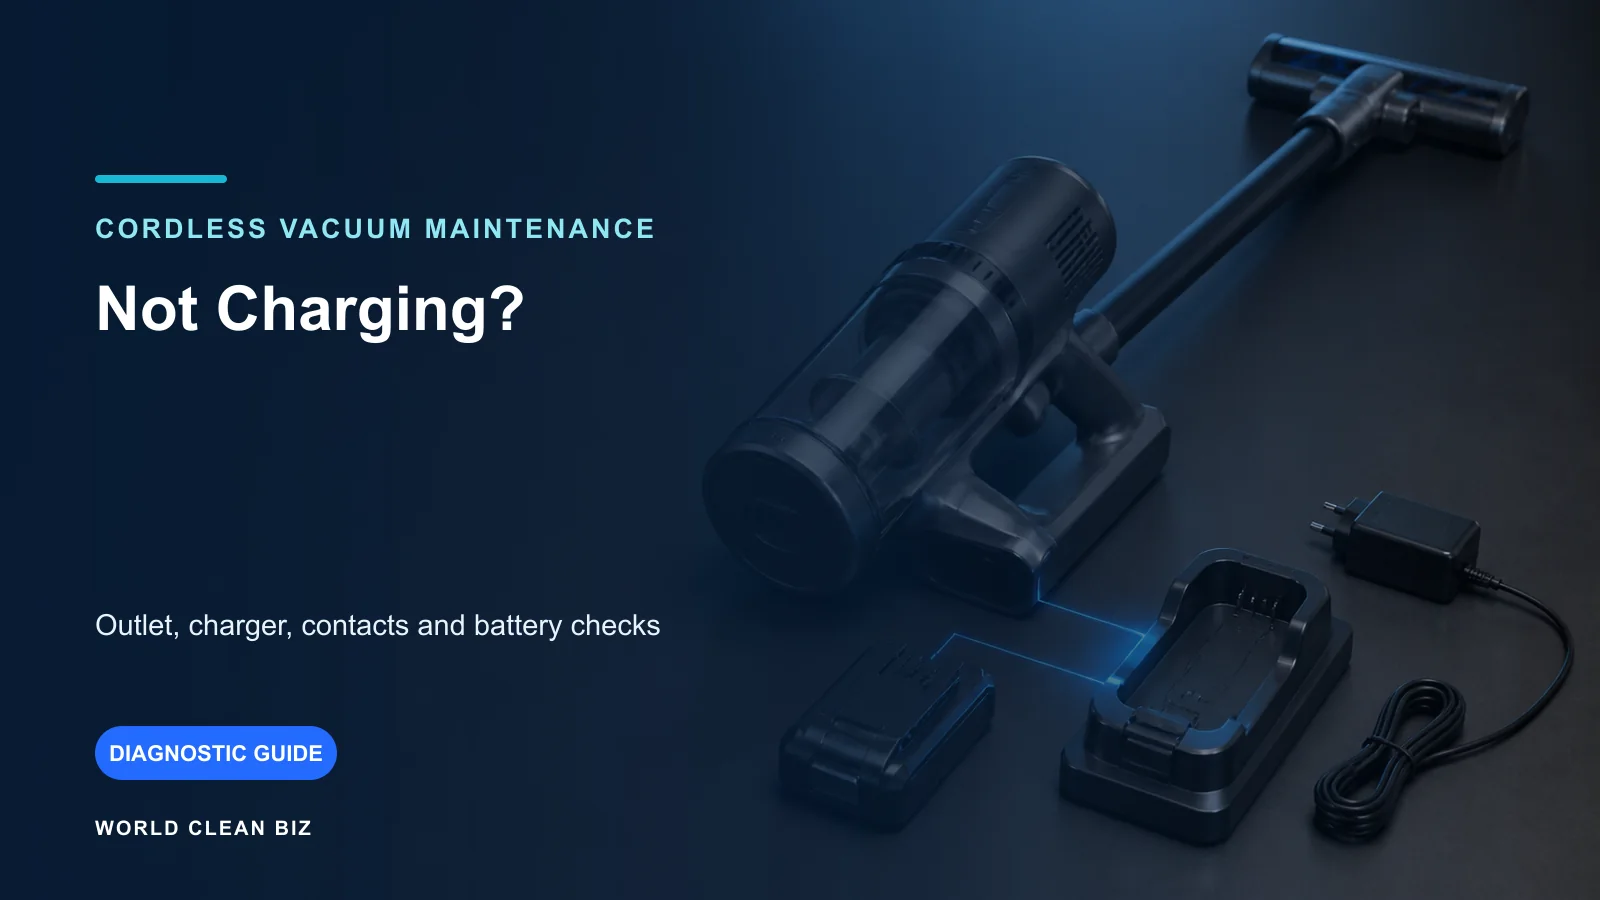
If your cordless vacuum is not charging, start outside the machine: verify the wall outlet, confirm that the charger is approved for the exact model and market, and check that the cable, dock or plug is fully connected. Then inspect only accessible contacts, confirm that a removable battery is fully seated and let the product return to its permitted charging temperature. If the expected charging indicator never appears, the fault may be in the charger, battery, dock or vacuum electronics.
Do not substitute a charger because its plug fits. Voltage, polarity, connector design and battery-management communication can differ even within one brand.
Cordless Vacuum Charging Problems at a Glance
| What you observe | Leading area | First safe check |
|---|---|---|
| No lights anywhere | Outlet, charger, cable, dock or deeply discharged battery | Verify the outlet and every external connection |
| Charging works with a direct cable but not the wall dock | Dock alignment, dock wiring or connection | Follow the model's direct-charge test if supported |
| Light reports a charger fault | Wrong, damaged or failed charger | Stop substitutions and identify the approved part |
| Light reports a temperature fault | Battery too hot or too cold | Move to the permitted environment and wait |
| Removable battery charges only after refitting | Battery latch, fit or contacts | Power off, remove and reseat as instructed |
| Vacuum says full but runs only briefly | Battery capacity, high-power mode, airflow or load | Separate charging failure from short runtime |
| Battery or charger becomes abnormally hot | Cell, charger or connection fault | Disconnect safely and use authorized service |
Stop for Battery or Electrical Warning Signs
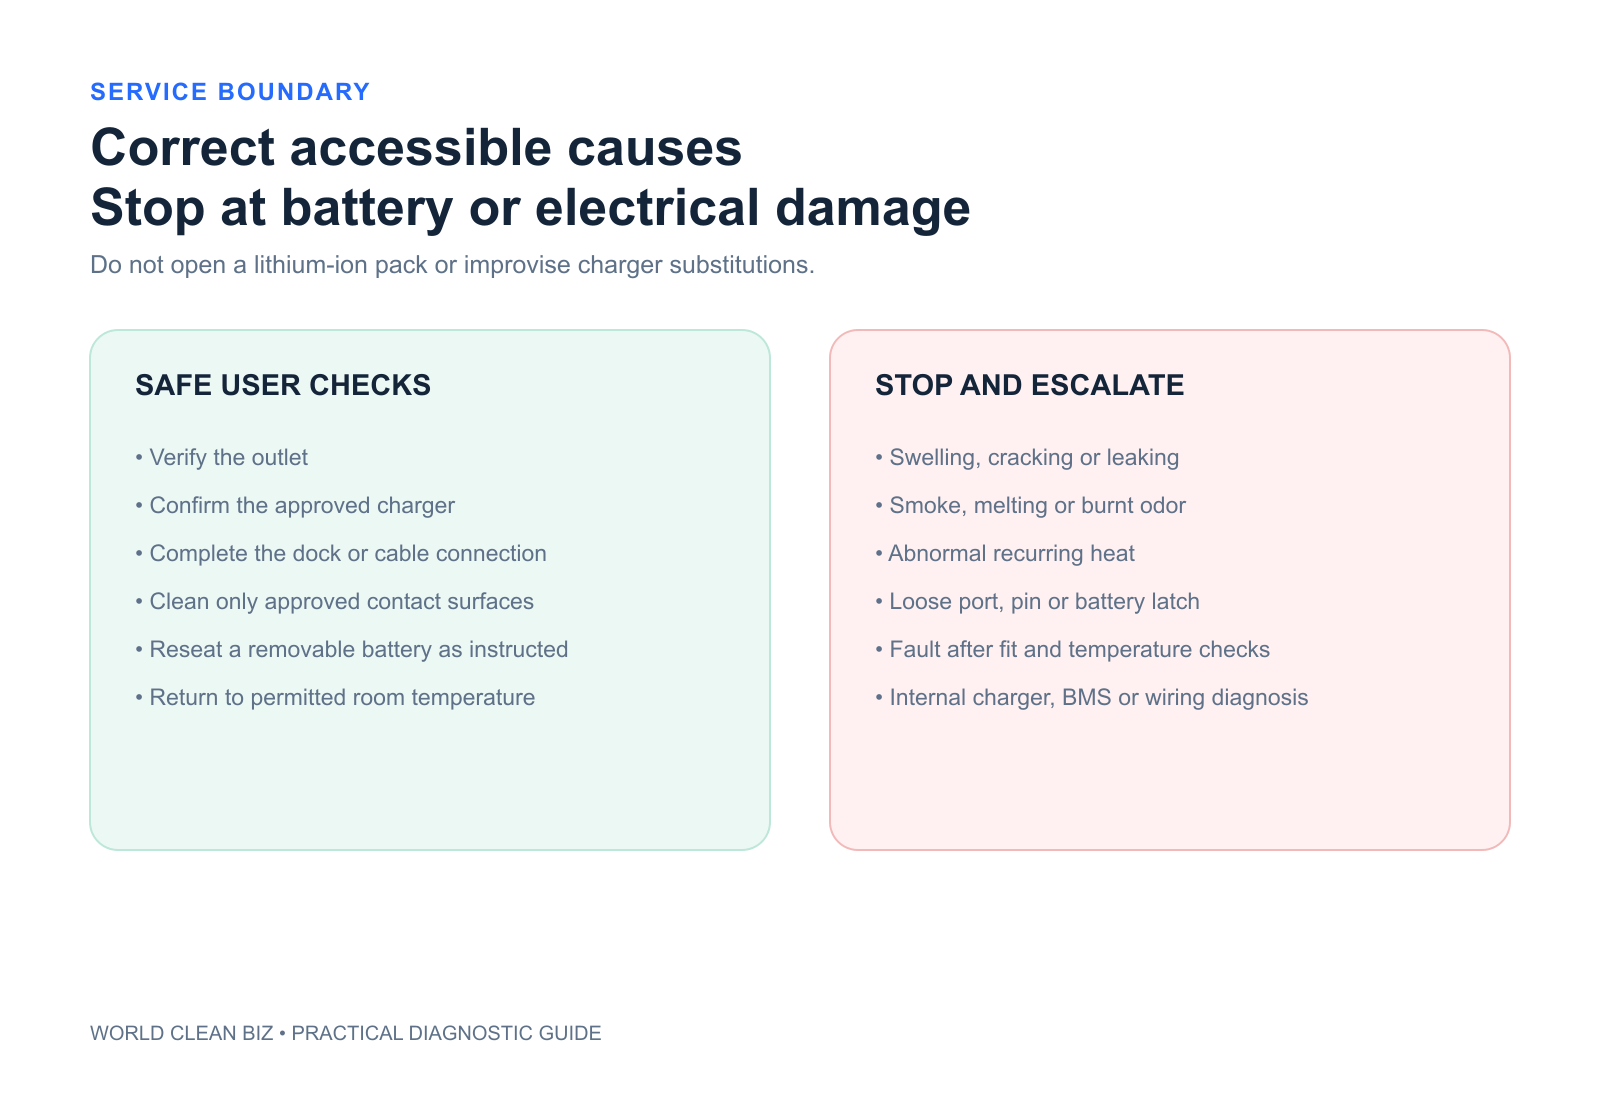
Stop charging or using the vacuum if you find:
- a cracked, swollen, leaking or deformed battery;
- melted plastic, scorching, sparks, smoke or burnt odor;
- a frayed cable, bent plug, loose socket or damaged charger housing;
- liquid inside a dry-only charging connection;
- unusual heat that returns after the product reaches normal room temperature;
- a charger, battery or vacuum involved in an impact or water event.
Do not open a lithium-ion battery pack, bridge contacts, probe the charger output, cool a battery in a refrigerator or dispose of it in household trash. Follow the manufacturer and local recycling rules.
1. Confirm the Charging Architecture
Cordless vacuums do not all charge in the same way. The product may use:
- a cable plugged directly into the main body;
- a wall mount that holds the charger plug in position;
- a powered dock with electrical contacts;
- a removable battery charged on or off the machine;
- a dual-battery charging station;
- a battery that can be charged only while installed.
Identify the model number and the intended path before troubleshooting. Shark's current IX140/IZ140 manual, for example, says that its battery can only be charged in the vacuum. Tineco's A10 Essentials FAQ says that model uses its adapter for charging and that the wall mount itself does not charge the device. These are product rules, not universal category rules.
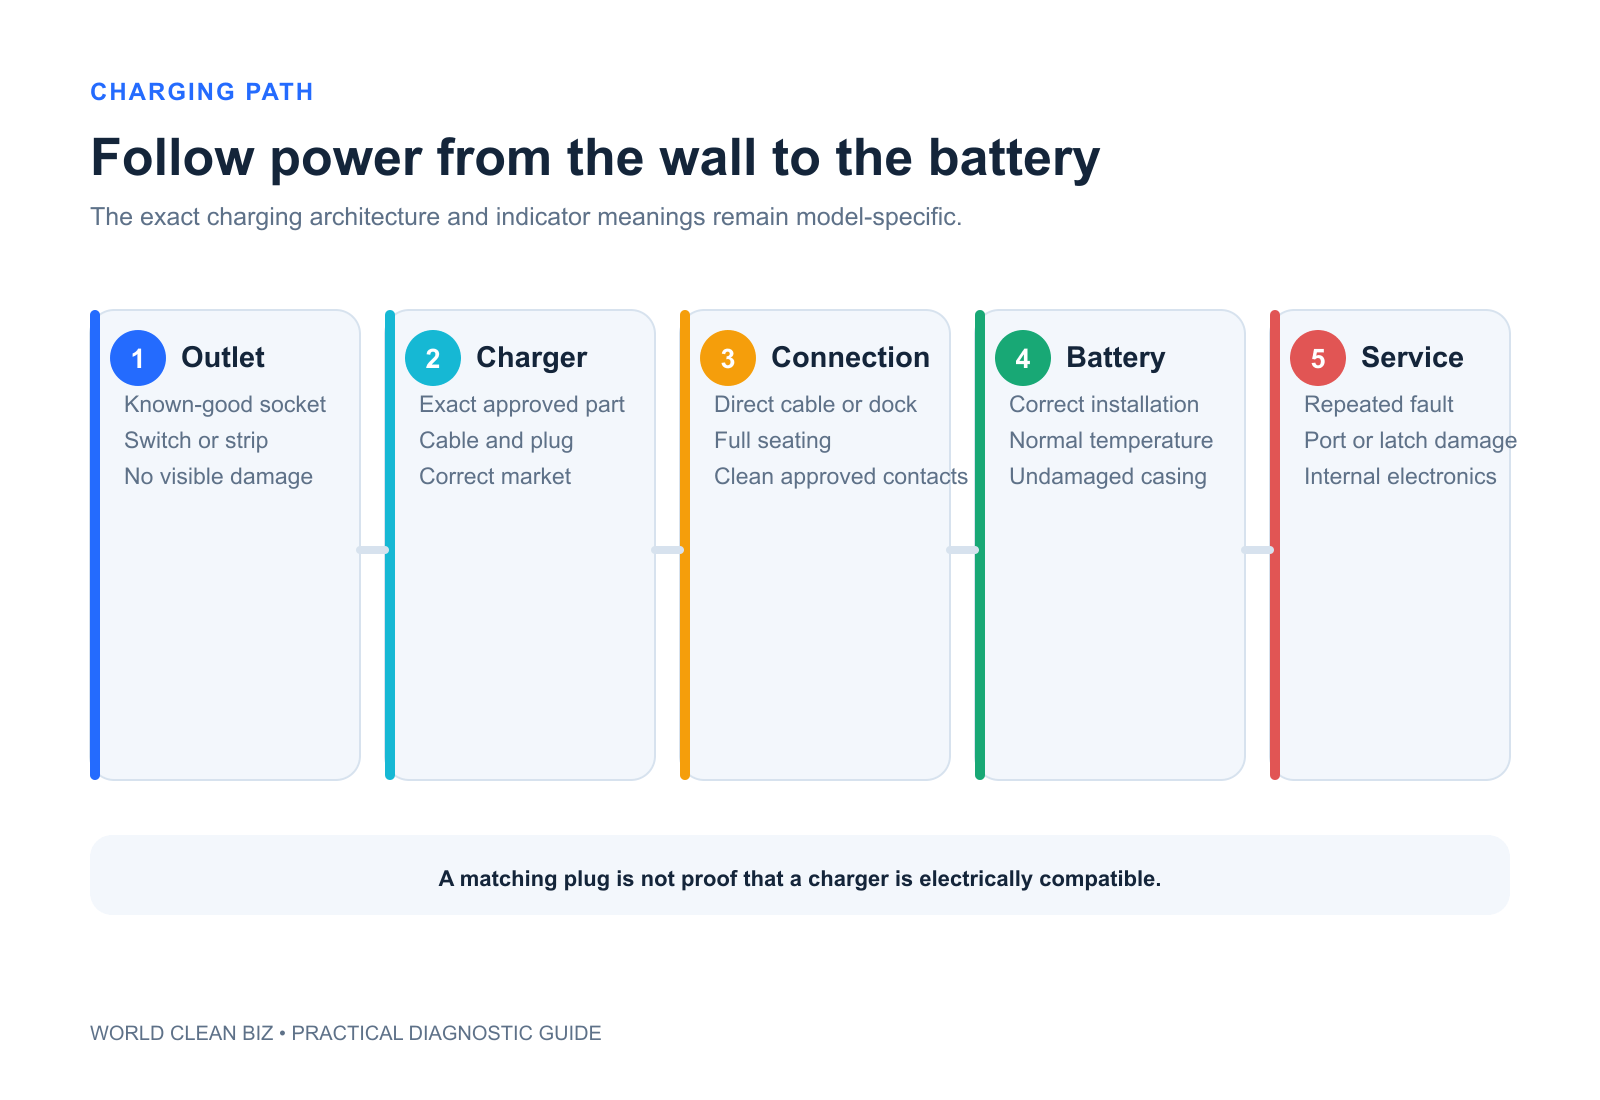
2. Test the Outlet and External Power Path
Verify that the wall outlet works with a safe known appliance. Check a switched outlet, power strip or wall switch if one is present. Then inspect the charger from the wall plug to the vacuum connection.
Confirm that:
- the charger label matches the exact vacuum or battery family;
- the plug is fully inserted at the wall and machine;
- the cable is not pinched behind a dock or furniture;
- a dock is mounted and aligned as the manual requires;
- no travel adapter, extension or third-party converter creates an uncertain connection.
Dyson's general no-power support tells owners of corded products to check cable damage and a working socket, then routes cordless machines through model-specific battery and airway diagnosis. Tineco's official A10 charging procedure likewise begins with the socket and original adapter.
3. Read the Charging Indicator Correctly
Lights that look similar can mean different things. Depending on the model, no light may mean fully charged, no power, a disconnected charger or a fault. A flashing light may mean normal charging, low battery, temperature protection, an incorrect charger or service required.
Record:
- the color;
- solid or flashing behavior;
- number of flashes;
- whether it occurs when plugging in or pulling the trigger;
- whether the battery was hot, cold or recently used;
- any screen message or reference code.
Dyson's V7 support distinguishes normal charging, fully charged, temporary temperature faults and persistent faults. A Shark handheld manual states that five flashes after plugging in can indicate the wrong charger. Use these examples only to understand why the exact manual matters.
4. Check Dock, Plug and Accessible Contacts
Power the system down before cleaning. If the model uses contact pads, inspect them for dust, oxidation, residue or a contact that does not meet its counterpart. Use only the dry or approved method in the manual.
For a wall dock that physically positions a cable plug, confirm that the plug has not slid backward and that the vacuum seats to its full depth. For a powered station, check that the station itself has power and that the battery or vacuum sits squarely.
Do not scrape contacts with metal, use abrasive paper, spray cleaner into a socket or bend spring contacts. A damaged or recessed contact belongs with service.
5. Reseat a Removable Battery
If the manufacturer permits battery removal:
- switch the vacuum off;
- release the battery using the specified latch;
- inspect the casing and accessible terminals without touching them with tools;
- reinstall until the latch is fully engaged;
- confirm the approved charger is connected to the correct charging point.
Tineco's PURE ONE S11 TANGO charging guidance tells users to confirm battery installation, charger condition, pin connection and accessible charging contacts. Do not transfer its icons or disassembly sequence to another model.
6. Let the Battery Reach a Safe Temperature
Lithium-ion packs commonly suspend charging when too hot or too cold. A vacuum used in maximum-power mode, stored in a cold vehicle or left in direct sun may need time in the approved indoor environment before charging resumes.
Place the vacuum on a stable, dry, ventilated surface away from flammable material. Do not force cooling or heating. If a temperature warning continues at normal room conditions, or if the pack heats abnormally while idle, stop and contact support.
7. Separate “Not Charging” from “Not Holding Charge”
A charging system can work while usable runtime has fallen. Confirm whether the battery percentage or indicator rises and whether the charger reaches its normal completed state.
Short runtime can instead result from:
- an aged battery with reduced capacity;
- maximum or boost mode;
- a blocked airway or dirty filter increasing load;
- a jammed powered floorhead;
- cold or hot operating conditions;
- an incorrect runtime estimate after storage;
- an internal battery or control fault.
Dyson's V11 support treats charging, short runtime, blockages, filter maintenance and battery replacement as related but distinct paths. For airflow diagnosis, use the WCB vacuum losing suction guide.
8. Decide Whether the Charger or Battery Is the Leading Suspect
Do not perform improvised electrical tests. Use only manufacturer-supported substitution, such as a known approved charger or a second compatible battery that the product already includes.
Evidence pointing toward the charger or dock includes no indicator across approved batteries, visible cable damage or charging that works only when a cable is held at an angle. Evidence pointing toward the battery includes a casing fault, repeated battery-specific warning, failure of one approved pack while another works or severe capacity loss after a normal charge.
If you do not have an approved comparison part, the safest next step is service diagnosis rather than buying an unverified battery and charger together.
When to Use Authorized Service
Use the manufacturer or qualified service when:
- the approved charger has no output indication and the outlet is known good;
- the charging port, dock pin or battery latch is loose or damaged;
- a fault returns after correct seating and normal temperature;
- charging starts and stops when the cable moves;
- the battery is damaged, swollen, leaking or abnormally hot;
- the vacuum needs internal wiring, battery-management or main-body diagnosis;
- the correct replacement part cannot be verified by model and market.
For category-level battery sourcing and safety context, see WCB's lithium batteries in vacuums and power tools and cordless vacuum development risks.
FAQ
Why does my cordless vacuum show no light while charging?
No light can mean fully charged, no charger power, an incomplete connection or a model-specific fault. Check the exact manual before treating it as proof of a failed battery.
Can I charge the battery with a charger from another vacuum?
Only if the manufacturer explicitly lists it as compatible with that exact model and market. A matching plug is not compatibility evidence.
Why will it charge directly but not on the wall mount?
The dock may be misaligned, the retained cable plug may have shifted or the station connection may be faulty. Follow the supported direct-versus-dock comparison for the model.
Should the battery be warm while charging?
Some warmth can be normal, but unusual heat, odor, swelling, melting or a temperature warning that persists at room conditions requires shutdown and support.
Does a short runtime mean the vacuum is not charging?
Not necessarily. If it reaches a completed charge state, reduced runtime may instead involve battery aging, power mode, airflow restriction or powered-tool load.
Final Answer
When a cordless vacuum will not charge, verify the working outlet, exact approved charger and complete charging connection first. Read the model-specific indicator, inspect accessible contacts, reseat a removable battery as instructed and allow the system to return to its permitted temperature.
Do not use an unverified charger or open a battery pack. Damage, abnormal heat, repeated fault indications or a failure beyond accessible connections requires authorized service.